Integrating with AWS SES
Amazon Simple Email Service (SES) is one of the most cost-effective ways to send transactional email. At $0.10 per 1,000 emails, it offers unmatched pricing — especially when paired with SendStreak’s templates, automations, and delivery analytics.
This guide walks you through the full setup: from creating your AWS SES credentials to sending your first email through SendStreak.
Prerequisites
Before you begin, make sure you have:
- An AWS account — create one here if you don’t have one yet
- A SendStreak account — sign up for free
- A domain you own (recommended) or at minimum an email address you can verify
- Access to your domain’s DNS settings (for domain verification and authentication)
Step 1: Verify a Sending Identity in SES
Before Amazon SES will send emails on your behalf, you need to verify that you own the email address or domain you want to send from.
Option A: Verify a Domain (Recommended)
Domain verification is the recommended approach because it lets you send from any address at that domain (e.g., [email protected], [email protected]) without verifying each one individually.
- Open the Amazon SES console
- In the left navigation, choose Identities
- Click Create identity
- Select Domain and enter your domain name
- Under Advanced DKIM settings, keep the default Easy DKIM option selected
- Click Create identity
AWS will generate three CNAME records for DKIM authentication. You’ll need to add these to your domain’s DNS settings. The records look like this:
| Type | Name | Value |
|---|---|---|
| CNAME | abc1234._domainkey.yourdomain.com | abc1234.dkim.amazonses.com |
| CNAME | def5678._domainkey.yourdomain.com | def5678.dkim.amazonses.com |
| CNAME | ghi9012._domainkey.yourdomain.com | ghi9012.dkim.amazonses.com |
Add these records at your DNS provider (e.g., Cloudflare, Route 53, Namecheap). Verification usually completes within a few minutes to 72 hours, depending on DNS propagation.
Option B: Verify an Email Address (Quick Start)
If you want to get started quickly without DNS changes:
- In the SES console, go to Identities → Create identity
- Select Email address and enter the address you want to send from
- Click Create identity
- Check your inbox for a verification email from AWS and click the confirmation link
Note: With email verification only, you can only send from that specific address. For production use, domain verification is strongly recommended.
Step 2: Set Up Email Authentication (SPF, DKIM, DMARC)
Proper email authentication improves deliverability and prevents your emails from being marked as spam. If you verified a domain in Step 1, DKIM is already set up. There are two additional records to consider:
SPF (Sender Policy Framework)
If you’re using a custom MAIL FROM domain in SES, add an SPF record:
v=spf1 include:amazonses.com ~all
If you already have an SPF record for your domain, add include:amazonses.com to it instead of creating a new one.
DMARC
A DMARC record tells receiving email servers what to do with messages that fail authentication checks. Start with a monitoring-only policy:
v=DMARC1; p=none; rua=mailto:[email protected]
Once you’ve confirmed everything is working, you can tighten the policy to p=quarantine or p=reject.
For a detailed walkthrough of all three records, see our guide on how to set up SPF, DKIM, and DMARC.
Step 3: Request Production Access
New AWS SES accounts start in sandbox mode, which means:
- You can only send to verified email addresses and domains
- You’re limited to 200 emails per 24-hour period
- You’re limited to a sending rate of 1 email per second
For real-world use, you’ll need to request production access:
- In the SES console, go to Account dashboard
- In the Your account is in the sandbox banner, click Request production access
- Fill out the request form:
- Mail type: Choose “Transactional” (or both if you also send marketing emails)
- Website URL: Your company website
- Use case description: Explain what types of emails you’ll send and how you handle bounces and complaints. Be specific — for example: “We send transactional emails including order confirmations, password resets, and account notifications. We use SendStreak to manage templates, track delivery, and automatically handle bounces and unsubscribes.”
- Click Submit request
AWS typically reviews requests within 24 hours. You’ll receive an email once your account has been moved to production.
Tip: If your request is denied, review the feedback from AWS and resubmit with more detail about your sending practices and bounce/complaint handling.
Step 4: Create SMTP Credentials
SES uses dedicated SMTP credentials that are separate from your regular AWS login. To create them:
- In the SES console, choose SMTP settings in the left navigation
- Click Create SMTP credentials
- This opens the IAM console — enter a name for the SMTP user (or keep the default)
- Click Create user
- Important: Copy and save your credentials immediately — they are only shown once. The SES console labels them SMTP username and SMTP password. In SendStreak, the corresponding fields are IAM Access Key ID (username) and IAM Access Key (password).
If you close the dialog without saving, you’ll need to delete the user and create new credentials.
Choosing the Right Region
Your SMTP credentials are tied to the AWS region where you created them. Choose a region that’s close to your users or your servers for the best latency. Common choices:
| Region | Endpoint | Best for |
|---|---|---|
| US East (N. Virginia) | email-smtp.us-east-1.amazonaws.com | North America |
| EU (Ireland) | email-smtp.eu-west-1.amazonaws.com | Europe (GDPR-friendly) |
| EU (Frankfurt) | email-smtp.eu-central-1.amazonaws.com | Europe (GDPR-friendly) |
| Asia Pacific (Sydney) | email-smtp.ap-southeast-2.amazonaws.com | Australia / APAC |
Note: The SES region you use for SMTP must be the same region where you verified your sending identity. If you verified your domain in eu-west-1, create your SMTP credentials in eu-west-1.
Step 5: Connect SES to SendStreak
With your SMTP credentials ready, connecting to SendStreak takes less than a minute:
- Log in to your SendStreak account and go to Settings → Email servers
- Click Create new (or use this direct link)
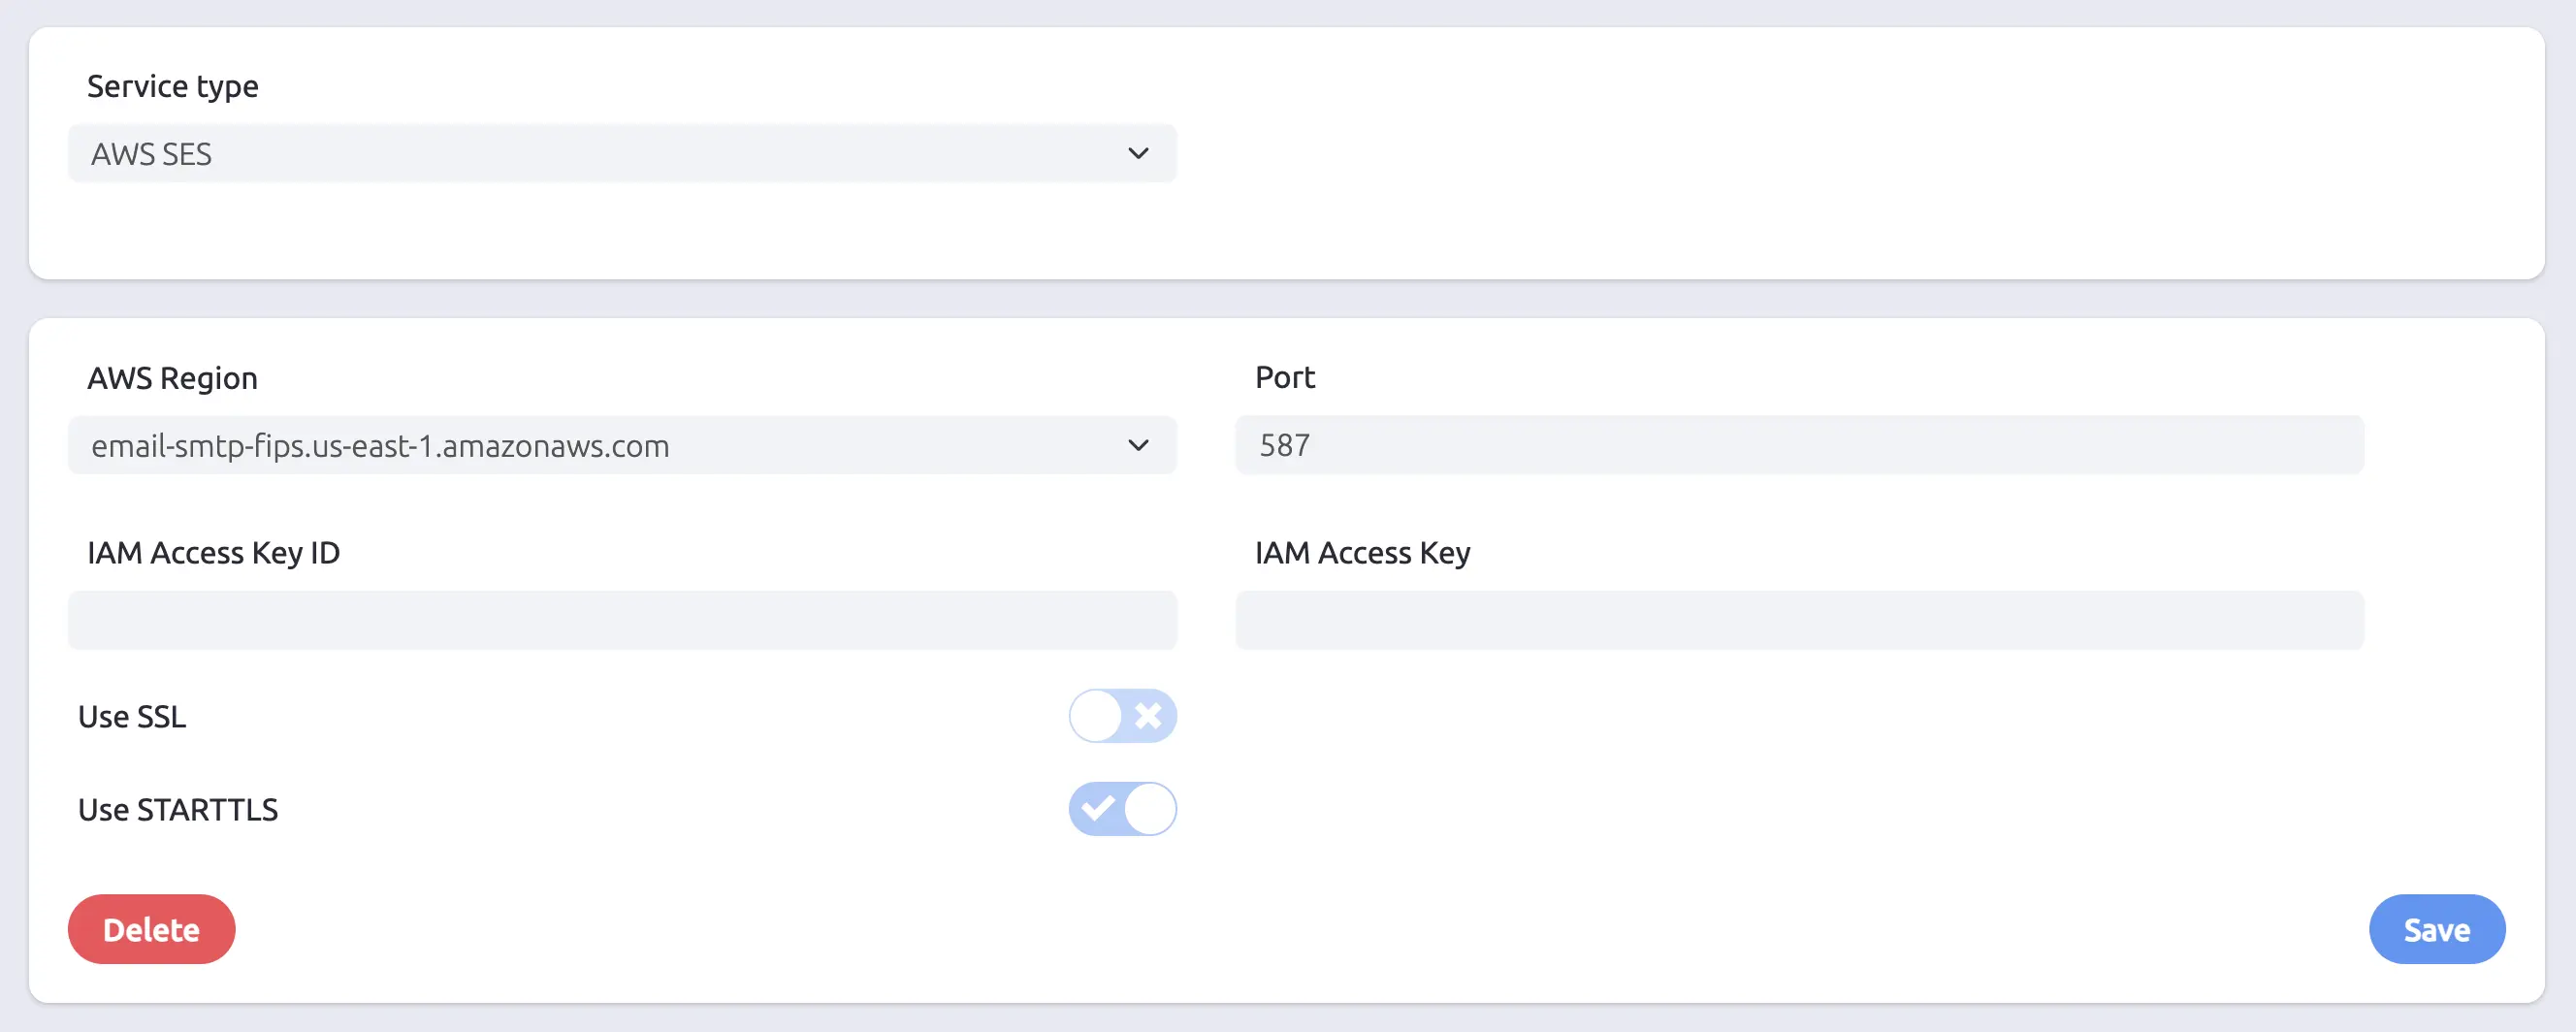
- Under Service type, select AWS SES
- In the AWS Region dropdown, select the region where you created your SMTP credentials — the SMTP endpoint is filled in automatically
- Enter your IAM Access Key ID and IAM Access Key (the SMTP credentials from Step 4)
- Click Save
SendStreak will validate the connection by establishing a real SMTP session with your credentials. If the connection succeeds, your email server is ready to use.
Assigning to Templates
Once connected, you can assign your SES server as the preferred email server for specific templates. This is useful if you use multiple email servers — for example, SES for bulk notifications and a different provider for critical transactional emails like password resets.
Troubleshooting
“Authentication failed”
- Double-check that you’re using the SMTP credentials from the SES console (Step 4), not your regular AWS access keys
- Make sure you’re entering the credentials in the right order: IAM Access Key ID is the username, IAM Access Key is the password
- Verify the credentials match the region you selected in SendStreak
“Connection timed out”
- SendStreak connects to SES on port 587 (selected automatically when you choose the AWS SES preset). This port is rarely blocked, but if you see timeout errors, the issue is usually temporary — try saving again after a few moments
- If the problem persists, verify that the selected AWS region matches the region where you created your SMTP credentials
“Email address is not verified”
- You’re likely still in sandbox mode. Either verify the recipient address in SES, or request production access (Step 3)
“Throttling” or “Rate exceeded”
- New SES accounts have a sending rate limit of 1 email/second and 200 emails/day in sandbox. After production access, default limits are typically 14 emails/second and 50,000 emails/day
- To increase limits, open a support case in the AWS console under Service Quotas → Amazon Simple Email Service
SES Pricing
Amazon SES pricing is straightforward:
- $0.10 per 1,000 emails sent
- No monthly fees — you only pay for what you send
- Receiving email: $0.10 per 1,000 emails + $0.09/GB of incoming data
- Check the AWS SES pricing page for current free tier details and regional pricing
Combined with SendStreak’s pay-as-you-go pricing of €2 per 10,000 emails, this makes SES + SendStreak one of the most affordable ways to send transactional email at scale — with all the convenience of templates, automations, and delivery analytics built in.
Best Practices
- Warm up gradually. Don’t immediately send thousands of emails from a new SES account. Start small and increase volume over several days to build a good sending reputation.
- Monitor bounces and complaints. High bounce or complaint rates can cause AWS to throttle or suspend your SES account. SendStreak tracks delivery status for every message sent, making it easy to spot issues early.
- Use a subdomain for transactional email. Consider sending from a subdomain like
mail.yourdomain.comto isolate your transactional email reputation from your main domain. - Keep your contact list clean. Remove invalid addresses and honor unsubscribe requests promptly. SendStreak’s audience management automatically tracks bounced contacts and prevents re-sending to them.
- Set up DKIM, SPF, and DMARC. These DNS records are essential for deliverability. See our complete authentication guide for step-by-step instructions.
Related Reading
- How to set up SPF, DKIM, and DMARC — Complete DNS authentication walkthrough
- What is SPF? — Sender Policy Framework explained
- What is DKIM? — DomainKeys Identified Mail explained
- What is DMARC? — Domain-based Message Authentication explained
- Email servers documentation — Managing email servers in SendStreak
- Common SMTP configurations — SMTP settings for popular email providers